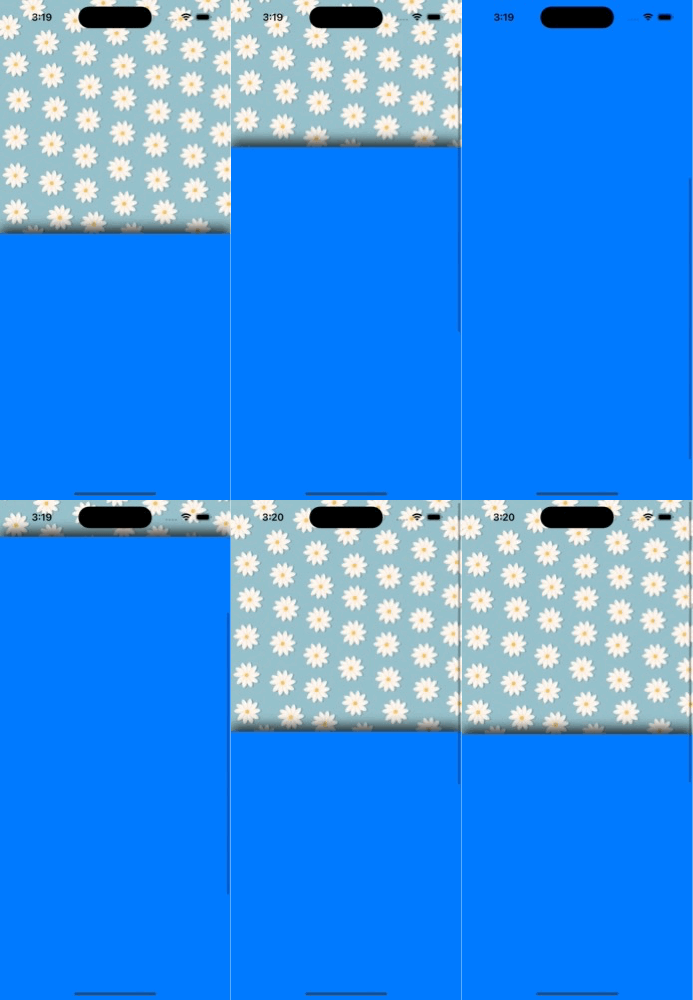
Parallax header effect in SwiftUI using CoordinateSpace

Parallax headers are a popular design pattern that can be used to create visually stunning interfaces in mobile and web applications. A parallax header creates the illusion of depth and movement by moving content at different speeds as the user scrolls.
In this blog post, we'll be discussing the implementation of a parallax header using SwiftUI. We'll be using the .named(coordinateSpace) modifier to create a coordinate space that will be used to calculate the position of the header as the user scrolls.
Creating the ParallaxHeader View
Our implementation of the parallax header will be contained within the ParallaxHeader view. The ParallaxHeader view takes three parameters: coordinateSpace, defaultHeight, and content.
struct ParallaxHeader<Content: View, Space: Hashable>: View {
    let content: () -> Content
    let coordinateSpace: Space
    let defaultHeight: CGFloat

    init(
        coordinateSpace: Space,
        defaultHeight: CGFloat,
        @ViewBuilder _ content: @escaping () -> Content
    ) {
        self.content = content
        self.coordinateSpace = coordinateSpace
        self.defaultHeight = defaultHeight
    }

    var body: some View {
        // ...
    }

    private func offset(for proxy: GeometryProxy) -> CGFloat {
        // ...
    }

    private func heightModifier(for proxy: GeometryProxy) -> CGFloat {
        // ...
    }
}
The content parameter is a view builder closure that returns the view that will be displayed in the header. The coordinateSpace parameter is the name of the coordinate space that will be used to calculate the position of the header. This should be the coordinate space of enclosing ScrollView we will implement later. The defaultHeight parameter is the default height of the header when the offset is 0.
Body
Inside the body of the ParallaxHeader view, we use a GeometryReader to determine the position of the header. We calculate the offset and heightModifier using the offset(for:) and heightModifier(for:) helper functions, which we'll discuss in more detail later.
var body: some View {
    GeometryReader { proxy in
        let offset = offset(for: proxy)
        let heightModifier = heightModifier(for: proxy)
        let blurRadius = min(
            heightModifier / 20,
            max(10, heightModifier / 20)
        )
        content()
            .edgesIgnoringSafeArea(.horizontal)
            .frame(
                width: proxy.size.width,
                height: proxy.size.height + heightModifier
            )
            .offset(y: offset)
            .blur(radius: blurRadius)
    }.frame(height: defaultHeight)
}
Our ParallaxHeader will be magical! It will give us a depth illusion when scrolling up. It will also make content stretch and blur when we try to pull it down! This will enrich the user experience and give a pleasant scrolling feeling!
Blur effect
We are calculating the blur radius for our header image. It should not be too large as to obscure the picture, but large enough to create a pleasant effect. I chose 10 as the maximum value for the blur radius. To create a smoother increase in the blur effect, I am reducing the rate at which it increases by dividing heightModifier by 20. You can experiment with different values to find what works best for your specific situation.
Calculating offset
private func offset(for proxy: GeometryProxy) -> CGFloat {
    let frame = proxy.frame(in: .named(coordinateSpace))
    if frame.minY < 0 {
        return -frame.minY * 0.8
    }
    return -frame.minY
}
The offset(for:) method calculates the current offset of the header view based on the position of the GeometryProxy relative to the specified coordinateSpace. If the header is above the top of the scroll view, the method returns a modified offset to make the header appear to move slower than the content. Otherwise, the method returns an offset that matches the user's scroll position. The second option make sure our content stays glued to the top of the screen. This calculation is based on the frame of the header view in the specified coordinateSpace.
Calculating height
private func heightModifier(for proxy: GeometryProxy) -> CGFloat {
    let frame = proxy.frame(in: .named(coordinateSpace))
    return max(0, frame.minY)
}
The heightModifier(for:) method calculates a modifier for the height of the header view based on the position of the GeometryProxy relative to the specified coordinateSpace. If the header is fully visible, the heightModifier is set to zero. If the header is not visible at all, the heightModifier is set to the minimum value of zero - we don't want to make our header smaller when scrolling up! Otherwise, the heightModifier is set to the current position of the header in the specified coordinateSpace.
Usage
Finally, we can use our parallax header and enjoy the effects!
struct ContentView: View {
    private enum CoordinateSpaces {
        case scrollView
    }
    var body: some View {
        ScrollView {
            ParalaxHeader(
                coordinateSpace: CoordinateSpaces.scrollView,
                defaultHeight: 400
            ) {
                Image("flower")
                    .resizable()
                    .scaledToFill()
            }
            Rectangle()
                .fill(.blue)
                .frame(height: 1000)
                .shadow(color: .black.opacity(0.8), radius: 10, y: -10)
                .offset(y: -10)
        }
        .coordinateSpace(name: CoordinateSpaces.scrollView)
        .edgesIgnoringSafeArea(.top)

    }
}
I have created a simple structure that uses an image as the header content. For this, I have used a free image of flowers. To simulate a large amount of scrollable content, I am using a very high rectangle. This is just enough to demonstrate the parallax effect. The critical part of our code is the .coordinateSpace(name: CoordinateSpaces.scrollView) modifier. This modifier allows us to precisely calculate offsets for the parallax effect. Additionally, I created a CoordinateSpaces enum that provides us with type safety and a namespace for our coordinate spaces.
Final effect
Here is a final demo of our ParallaxHeader:

I hope you like it!


